explore
Kiln Combing with Patty Gray
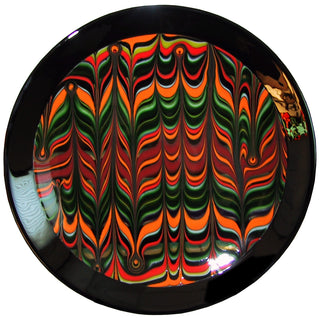
Learn how to comb glass with one of the glass industry's leading professionals, Patty Gray.

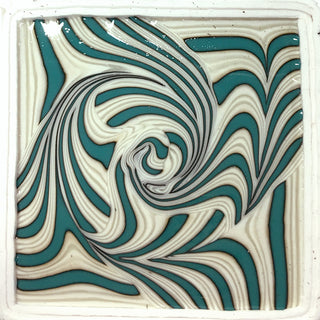
Combing is an exciting process of manipulating hot glass in a kiln. Make sure you have all the proper equipment, clothing, glass, etc., before you begin.
Note that the temperatures given here work well for Oceanside Compatible™ glass. (For COE 90 glasses, the combing temperatures will need to be somewhat higher or held for longer periods. You may need to experiment a bit with your kiln but start with a range between 1650ºF and 1700ºF as your combing temperature.)
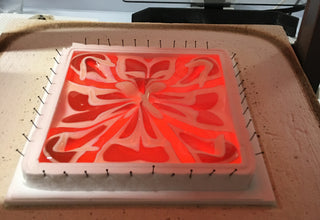
When I work in larger kilns that can accommodate standard 20" kiln shelves, I normally use 18" long x 1/4" wide glass placed on-edge atop a base of 18" x 18" clear glass. For the small 8" kilns, I use a 7" square shelf and make the strips ⅜" or ½" by 5 ½" without a clear base. For these smaller combings I use 1/8" thick ceramic fiber strips, wrapped around the glass three times (strips are ⅜" wide lined with ⅜" strips of Papyros that are secured with Elmer’s Glue®). I use stainless steel Bridal Lace sewing pins to secure the fiber around the glass to create a dam.(See images on following pages that show this damming technique.) Stainless steel square or round rings lined with ⅛" ceramic fiber + Papyros (secured with Elmer’s Glue) work well also for damming a combed piece.
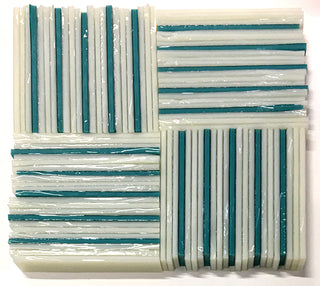
I arrange glass strips on-edge so that I can get really tight lines, lots of color/pattern. For the larger combings, these vertical strips are supported with two strips stacked
flat on each end (this really is helpful when transporting the kiln shelf to the kiln). Alternatively, I will dam the large set-ups using kiln shelf strips (⅛" fiber + Papyros between the kiln shelf strip and the glass.) Damming is critical to ensure that the finished combing will be ⅜" thick with an even perimeter. If the glass is not dammed, it will spread and become ¼" thick with irregular edges.
Since kiln wash breaks down at high temperatures, I use ⅛" ceramic fiber, with Papyros on top, between the glass and kiln shelf. If you want to do the combing directly onto kiln washed shelves I recommend using irid glass as a base (irid side down touching the kiln washed shelf) which will release from the kiln wash.
If not using a base glass, place the strips on-edge directly on the ⅛" ceramic fiber topped with Papyros, and dam the perimeter. Without a base piece of glass, you can heat the glass quickly until it reaches 1660º F.
Once the kiln reaches 1660º F, I begin combing. Iturn off the kiln just prior to opening the door of the kiln, and begin the combing process. I use two combing rods which allows me to pull and push the glass strips simultaneously and I can also manipulate the glass more before the glass stiffens (gets too cold to comb). After each combing I shut the kiln, turn power back on and wait for the temperature to reach 1660º F and repeat the combing of the glass until the desired pattern is achieved.
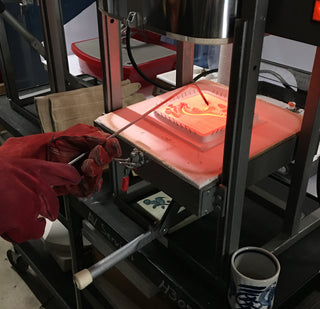
Glass sticks to hot combing rods. If the glass starts to stick, stop combing and cool the combing rods by dipping the tips of the rods in water. Make sure they are dry before starting the next combing.
When I am satisfied with the combing, I take the temperature back up to 1660º F to level out the glass (the valleys made from the combing fill in to become smooth). I do not hold the temperature at 1660º F.
There are times I will flash vent the combed piece to 1100º F to prevent further fusing or devitrification on certain glasses. Note that if you drop the temperature below 1100º F, you run the risk of warping the glass sheet or possibly cracking the glass itself.
Resist the temptation to open the kiln too soon! The only times I have experienced breakage (thermal shock) wasn’t because of the glass or annealing schedule – just impatience!
Have fun. Be safe. Combing glass is very rewarding!
The PDF contains firing schedules, a materials list, and safety tips. Be sure to read all information.

