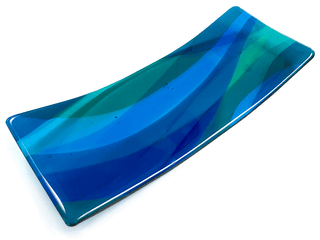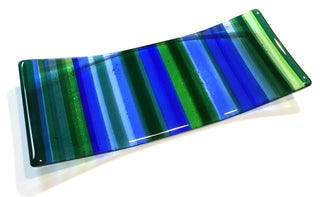
explore
Using damming molds
To Create Multi-Layered Patterns of Transparent Color
Fused projects featuring stripes, curves and plaid designs can be created with two layers of glass without requiring damming (the building of a “wall” around a project that will be thicker than 1/4" when full-fused). Damming projects by using fiber paper, damming bricks, etc., can yield thicker, often more dramatic designs, but can be time consuming, and often require additional work to clean up the edges of the fired pieces.
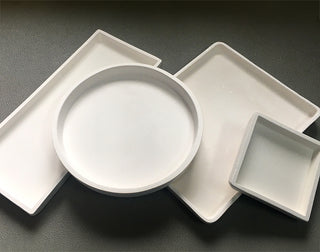
By utilizing a well-designed damming mold however, like the Patty Gray damming molds from Creative Paradise Inc., you can easily deepen color, tint colors and add dimension. Plus the edges of the finished pieces generally come out much cleaner, so you can usually move straight into the slumping phase without additional cold-working of rough edges.
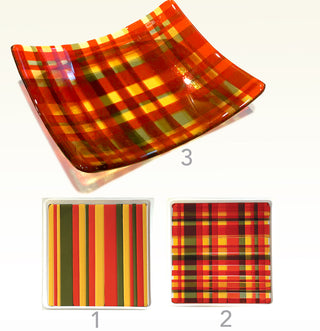
Transparent Plaids and Stripes are illustrated here, and we also offer a Project Guide with step-by-step instruction to create a free-form layered wave design (“Dammed Waves”), but the possibilities are numerous. When layering a piece 3-4 layers deep, adding pieces of Clear glass can add dimension and pull darker colors back a bit to avoid heavy, over-saturated areas, as well as creating lovely lighter tints of the chosen palette.
You can either create your pattern to follow ahead of time, or cut out glass pieces and just design as you go. If choosing a plaid, keep in mind that you will be switching directions of the cuts in the 2nd layer, 3rd layer, etc. If the mold is rectangular, that will drive your plan for the length of your cuts in layers 1, 2, 3, etc. as you will alternate vertical and horizontal lengths of glass moving through the layers to achieve the plaid design. Start with the first layer, laying pieces down on your drawn mold guide to make sure all pieces fit fairly well together, then start adding your second layer, etc.
Layering Color in the
Tinted Stripes Design
Many colors will work well with this type of design. For this example, we used the following colors: Clear 100S-ICE-F, Pale Blue 100S-ICE-F, Light Blue 132S-F, Dark Blue 136S-F, Sea Green 528-1S-F & Light Green 121S-F. (The finished piece is shown on page 1.)
Using three to four transparent colors, plus Clear works well when looking to create multiple color variations. Adding strips of Clear glass also allows you to pull back the value of some colors. By partially overlapping two of the same color pieces, or stacking two to three different colors, you can create areas of richer tints, and create new variations of many colors.
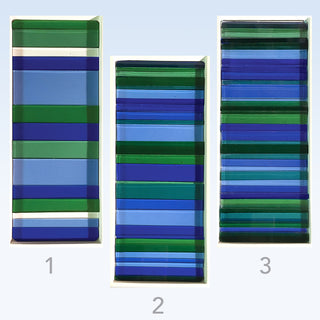
In the design shown here, we used the 12.5" x 5" #GM178 mold, so all pieces measured just a hair under 5" (to let the piece easily fit into the mold) and then were cut to varying widths: 1/4" 1.5”, 3/4" 1" and 1-1/4” in each of the colors. You can see in the photos at right how the layers looked as they were stacked 3 layers deep, layer-by-layer into the mold to achieve the linear tints of all colors.
TIPS: Use the richer, darker colors on layer one and then more sparingly on upper layers for a more subtle tinted effect. Slightly nip the corner/edges of the pieces of glass that will sit at the corners of your mold, as the interior walls of the molds have slightly rounded corners (only 1/8" from the very tip is necessary).
Have fun blending colors!
The PDF contains firing schedules, materials lists, and more details..
Creating
Color-Blending Plaids
Choose a color palette that works well together on its own, as well as when combined in overlapping color combinations. Cut pieces of each color into measurements equaling the length (and the width for the alternating layers) of the mold and then 1-1/4", 1", 3/4",1/2", and 1/4" widths. As you begin to stack your layers, you will use fewer of the dark colors and more of lighter shades and Clear to create depth.
Use your “Mold Guide” to begin the process of stacking the pieces of glass for your first layer in a pleasing combination. Next, crisscross a second layer, and proceed until all layers are done and you create he plaid look you desire. Make adjustments, as needed. What you see is generally what you’ll get after fusing, so add Clear glass as needed, or swap out different widths to achieve the look you want. All layers should be composed of the same volume of glass across the surface, basically the equivalent of a solid layer of glass. Once you are happy with your design, carefully recreate in the prepared mold for firing.
Have fun blending colors!
The PDF contains firing schedules, materials lists, and more details..
Other Projects made using a damming mold

Grid item
Perfect for lookbooks and editorial photography


