Working with Oceanside Compatible®
Iridescent Glasses
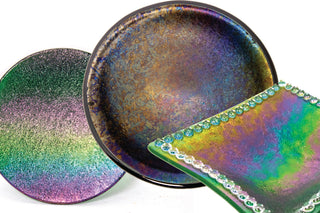
Our iridescent glasses have been flash-fired with a micro-thin layer of metallic crystal creating a reflective surface that shimmers in rainbow, silver, or gold tones. Because of its metallic nature, the coating has specific characteristics that are important to understand as you plan fused glass projects. Below, you will find information, tips, and ideas to help you achieve your fusing goals using Oceanside Compatible iridescent glasses.
The metallic coating doesn’t melt
Since the irid coating on the surface does not melt during fusing, it resists bonding. If you were to try to fuse two iridized surfaces facing one another, they will not bond well, if at all. There just isn’t enough glass surface available to create the bond.
This also means that when stacking a design on top of an Iridized surface, you may get more of a tack-fused look than you intend. Use this to your advantage to create very dimensional work, or adjust your schedule to melt the glass further.
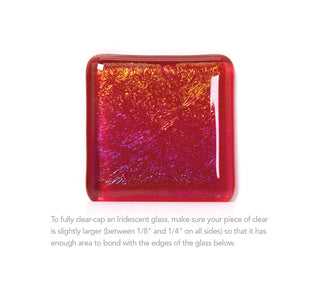
To fully clear-cap an Iridescent glass, make sure your piece of clear is slightly larger (between 1/8" and 1/4" on all sides) so that it has enough area to bond with the edges of the glass below it.
The metallic coating doesn’t stretch
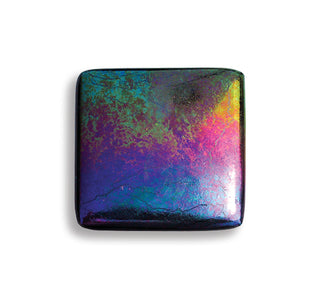
This is why a crackling effect can be seen when Iridescent glasses are allowed to spread — especially when the irid surface is on top, face-up. (See example at left.) Enjoy the look—alternately, dam pieces or construct them using a circular design (where the glass tends to draw inward when full-fused) to minimize the effect.
Note that clear-capping produces more of a pinching or crinkling look as the clear presses into the coated surface below. (See red tile above that was clear capped.)
The same coating is more dramatic on darker glasses
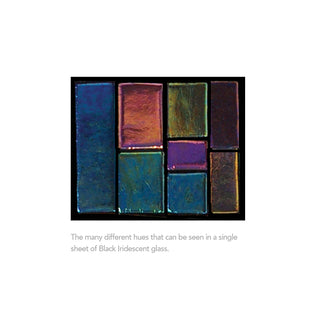
The rainbow iridescence on Clear or White is much more subtle and delicate than on darker colors or Black, which is the most dramatic. See photo at right illustrating how sections of Iridescent Black can be used as separate colors in a piece.)
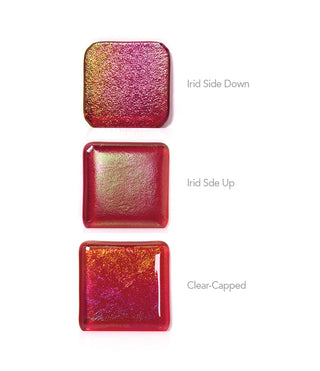
Firing for different effects
Irid Side Down
In this example, the iridescent surface of the glass is placed face down on the kiln shelf paper, with a piece of clear on top. This look can make a lovely matte finish for either the top or bottom of a piece.
Irid side up
In this example, the iridescent surface of the glass is placed face up on top of a piece of clear. This gives the most opportunity for glass to spread and crackle the irid surface.
Irid side up and capped with clear:
In this example, the iridescent surface of the glass is placed face-up and capped with a slightly larger piece of clear glass on top.
Download the PDF for further detail and to keep handy in your studio as you explore working with Iridescent glasses.

